
On my last backpacking trip, as I made my way to Cold Mountain one of my aluminum Black Diamond trekking poles snapped. The cause baffled me. I planted the pole in the mud, leaned forward, and as I did the pole just went. With over a day and half of hiking to go, I stopped and made a hiking pole from a fallen branch.
The following day I needed to put the stick away, but it was wood and much too long to do anything with so I was forced to carry it. As I walked back, ideas for how to make a trekking pole started popping in my head.
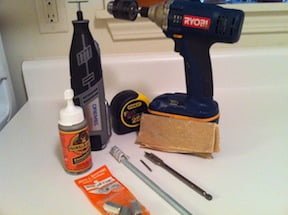
If you’re interested in making your own, keep reading. It’s actually pretty easy. You’ll need a few things, some tools, and about an hour to do the brunt of the work.
1. Cut the branch (your new trekking pole) in half.

2. Using a 1/4″ drill bit drill a hole deep enough into the branch to drop your 5/16″-18 X 7/8 coupling nut in and keep it flush with the top of the stick.

3. Fill the hole halfway with Gorilla Glue.

4. Push the coupling nut into the hole in the branch, and use a Q-tip to remove any excess glue.

5. Repeat steps 2-4 for both branches.
6. Measure the distance of the two coupling nuts against the 5/16″ threaded rod, and cut the rod with your Dremel.

7. Take the cut piece of threaded rod and screw it into the top section of your trekking pole. Do this before the glue dries so the rod will be glued as well. Let the two pieces dry overnight. To make the pieces go together more easily try spraying some WD-40 down the nut coupling first.

That’s it. Screw the two ends together when you need ’em and take ’em apart when you don’t.