Christmas is a special time of year. Setting up the tree, spreading holiday cheer, and running in a costume in the Reindeer Romp 5K in Jamestown, NC. The tree is easy, my wife and I bought a fake one. Holiday cheer is also fairly easy. The latter, however, is somewhat difficult.
In the past I’ve run as a Christmas present, the Grinch (with a sleigh), and a Christmas tree. This year, I wanted to go as something completely ridiculous (well, ridiculous-er). I thought of something awesome, was all gung-ho, then had to change it due to unforeseen circumstances requiring my son to join in on the fun. So, I asked the little guy what he thought we should make and he went with the one thing he loves more than anything else—The Polar Express.
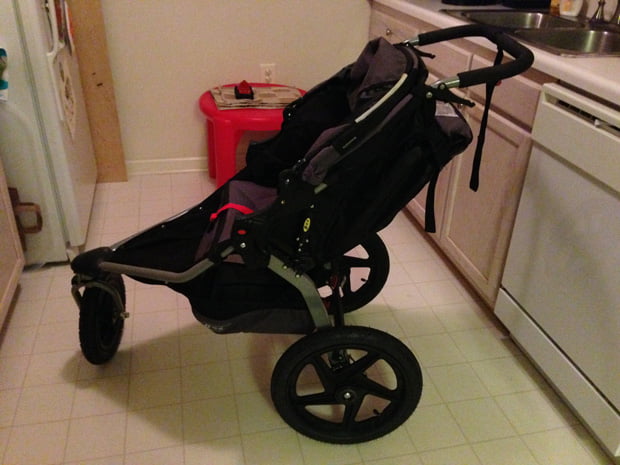
I went to work sketching out a plan. The train I was to create would have to be light and roadworthy. Sure I pushed a baby jogger done up like a sleigh a couple years back, but pushing a sleigh with a 20 pound child while wearing a Grinch costume is way different than pushing a train with a 35 pound child in a shirt and tie. The challenge was coming up with a train that was light enough to push, and sturdy enough to last the full 5 kilometers.
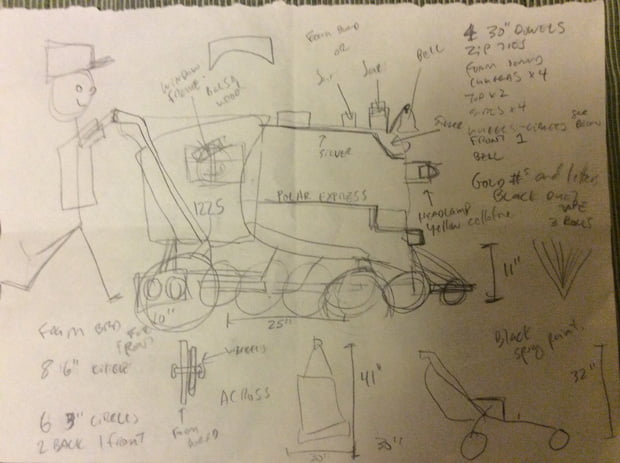
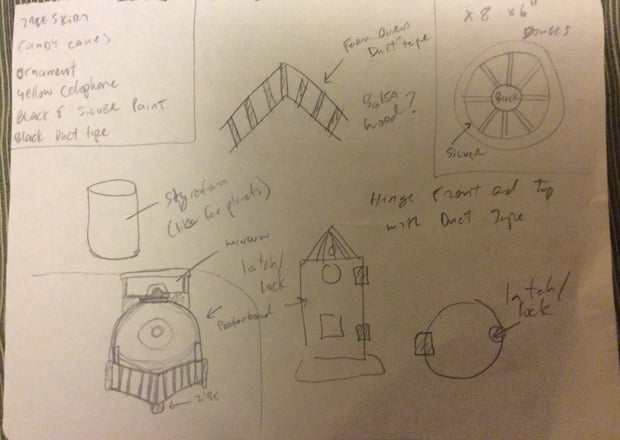
For the frame, I’d use foam board, duct tape, and wooden dowels. For the odds and ends I’d stick with balsa wood and styrofoam.
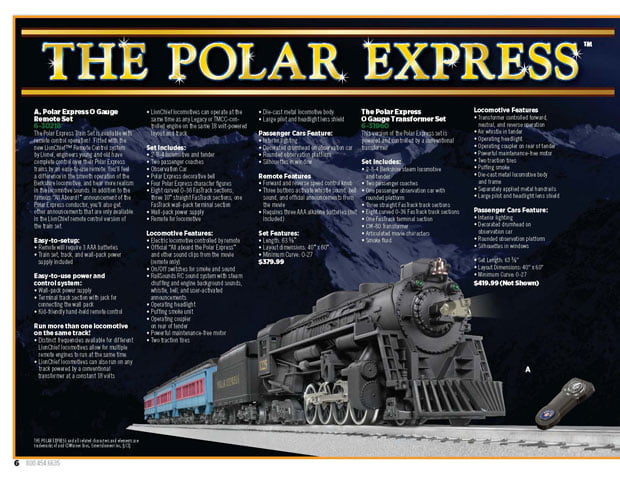
Using my sketch, supply list, and a page from the Lionel 2013 Christmas catalog as a reference, my son and I hit up our local Hobby Lobby and began picking out the items we needed.
Supplies
As we walked around the store I piled the supplies around and on top of my son who was conveniently sitting inside the cart’s basket, and he was sure to tell anyone who would listen that we were building the Polar Express.
- 6 20″ x 30″ black foam board
- 3 20″ x 30″black presentation board
- 3 rolls black duct tape
- 1 roll silver duct tape
- 3 1/2″ x 36″ wooden dowels
- 2 packs of 1/2″ dowel caps
- 4 3/16″ x 1/8″ balsa wood strips
- 2 3/16″ x 1/16″ balsa wood strips
- 8 6″ styrofoam circle donuts
- 1 6-pack 3″ styrofoam circles
- 1 6-pack styrofoam half circles
- 1 can of silver spray paint
- 1 can of black spray paint
- 1 gold paint marker
- 1 bottle of tacky glue
- 1 bell
Following Hobby Lobby we hit up Lowe’s for a pack of black zipties. Truth be told, we had to return to Hobby Lobby later in the afternoon to pick up more stuff which included a few of the items in the above list. And, I had to ask my wife to pick up black duct tape twice during the construction process.
The Build
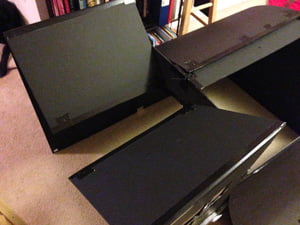
In the past I chronicled the build throughout the process. This year, because my son was helping (and by that I mean he kept running off with the supplies and building a construction site with his “tools”) I only took photos near the end so I’ll show you pics of the finished pieces as I go along.
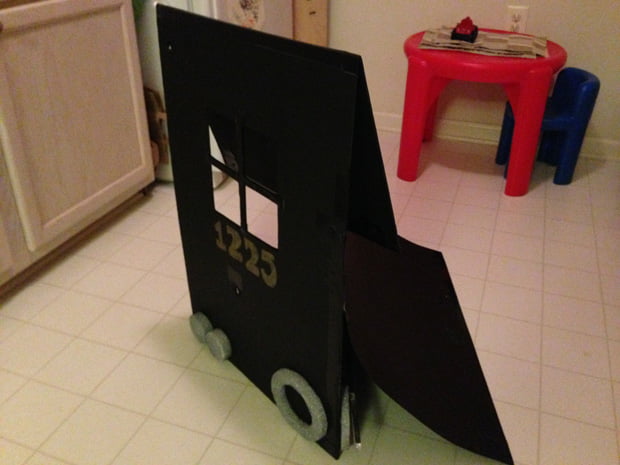
1. I started out by using three pieces of foam board for the top and sides of the cabin. Using a razor blade I cut out two 8″ squares from the sides, and duct taped the three pieces together on the outside and inside so the pieces could fold up and down.
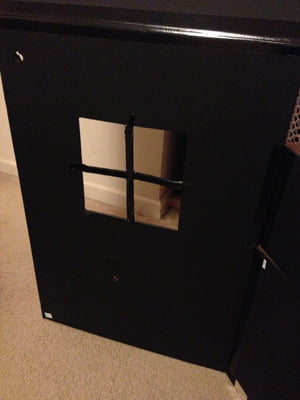
2. Turning two pieces long ways, I cut off 6″ from the bottoms so my foam board was now 14″ x 30″. I then duct taped each piece to each side of the cabin, again on both the inside and outside.
3. To complete the cabin I took another piece of foam board and cut a 12″ x 30″ rectangle to serve as a crossbar (and giving my son an 8″ front window). I then taped it to one side of the cabin, and the put tape at the other end so the piece of tape folded over to cover the edge of the crossbar on the front and back. I measured off the center of the end not taped to the side of the cabin and punched a hole through it with a pencil. Using the same measurement I punched a hole in the side of the cabin. I placed two pieces of duct tape over the holes, punched the pencil back through the hole, and used a ziptie to secure the two pieces together. The train had to fit in a car so I had to be able to fold it down flat. By creating two separate pieces and connecting them with zipties (when in use) I was able to make it somewhat portable.
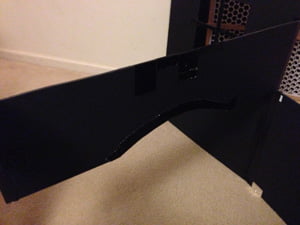
4. I placed my son in the jogger to get a sense for necessary leg room, and then cut out a quasi half moon from the cross bar. More duct tape along the edge to prevent the foam board from fraying (in case my son rammed his knees into the edge) and I was ready for the next step.
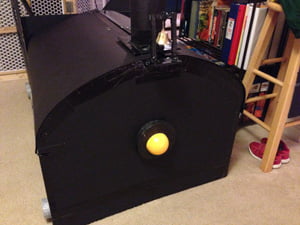
5. The front of the train required taping one of the 6″ x 30″ pieces to a full sheet of foam board. Then, I cut off a rounded edge that would be necessary for the firebox. Again, I taped one side of the front to the side of the train that I had taped the crossbar to, and used my ziptie method for the other (punching holes at the top of the bottom of the piece).
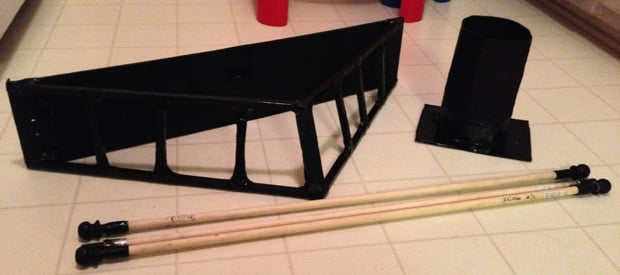
6. With my frame complete I took the wood dowels and taped them to the baby jogger. I then measured off where I needed to punch holes in the side of the train, punched the holes, and then slid the frame over the dowels. This is how the train would rest on the jogger. On race day, I ziptied the dowels to the frame to prevent movement.
7. I needed a flat piece of foam board to run from the cross bar to the domed front piece so I used a 6″ x 30″ piece (cut from a leftover piece at step 2) and taped it to the front. Then, I punched a hole at the crossbar joint so I could ziptie those two pieces later on.
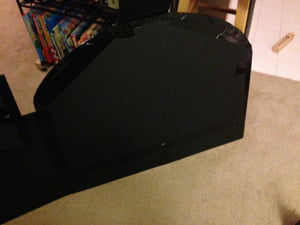
8. The black presentation board was stiff, but flexible enough to bend and form the front-top of the locomotive. I taped both sides of the presentation board to the sides of the train and then taped the edges by folding over a piece of duct tape where the two presentation board met in the middle. I punched holes through the presentation board and the top piece of foam board I had taped in the previous step.
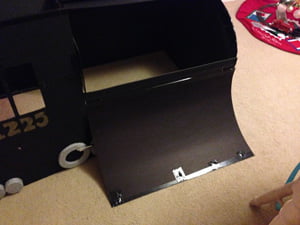
9. Moving on to the cow catcher, I used a 6″ x 30″ piece of foam board as the base. I then took a piece of balsa wood and formed a triangle for the bottom and another, shorter one for the top. I taped them down with duct tape and then cut multiple 5″ pieces to angle from the top to the bottom. Once complete, I punched holes at the left and right sides and in the middle. Instead of painting the balsa wood black, I just used a ton of duct tape.
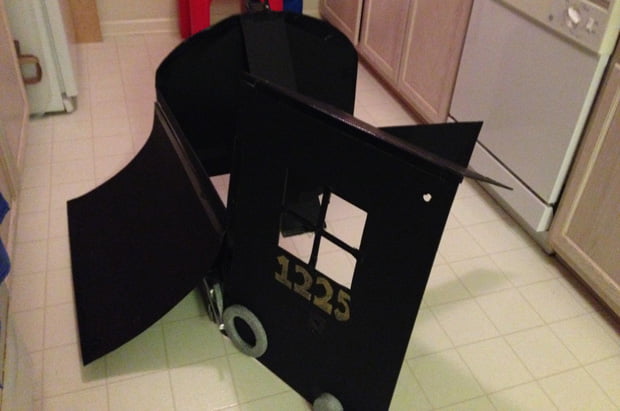
10. The wheels were planned to be really complex, but after working with balsa wood (and by that I mean my son shattered a number of pieces slaying dragons with balsa swords) I opted to go with spray painting the 6″ and 3″ styrofoam pieces silver and called it a day. I used yellow model paint that I already had on hand to paint the headlight. Once everything had dried, I used tacky glue to fasten the wheels and headlight on the train.
11. My son calls the metal pieces that connect the wheels “chuggas.” I don’t know why, and since I don’t know what they’re actually called I’ll call them “chuggas” as well. I eye-balled the measurement of the chuggas and cut down two 3/16″ x 1/8″ pieces of balsa wood to fit. After wrapping them with silver duct tape I duct taped them to the wheels and train.
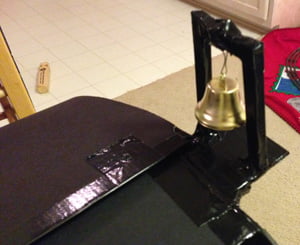
12. For a bit of added fun I built a bell mount for the front of the train. Just a bit of duct tape, some foam board, a few pieces of balsa wood, and a paper clip to attach the bell.
13. A train isn’t complete without a smoke stack. I cut a 6″ x 8″ rectangle as a mount, then cut an 8″ x 30″ strip from the last piece of presentation board. After some work I molded the board into a circle and taped it down to the base. I then punched holes through the base to match the ones on the train’s firebox.
14. I measured off the center of the cabin’s roof and cut it in half. I then taped the edges and punched holes on both ends. <– necessary for an easy way to get my son in and out.
15. The windows looked dull so I created an inner frame using 2 pieces of 3/16″ x 1/16″ balsa wood and black duct tape.
16. For the tips of the dowels I used the dowel caps and painted both the caps and the dowel tips with black spray paint.
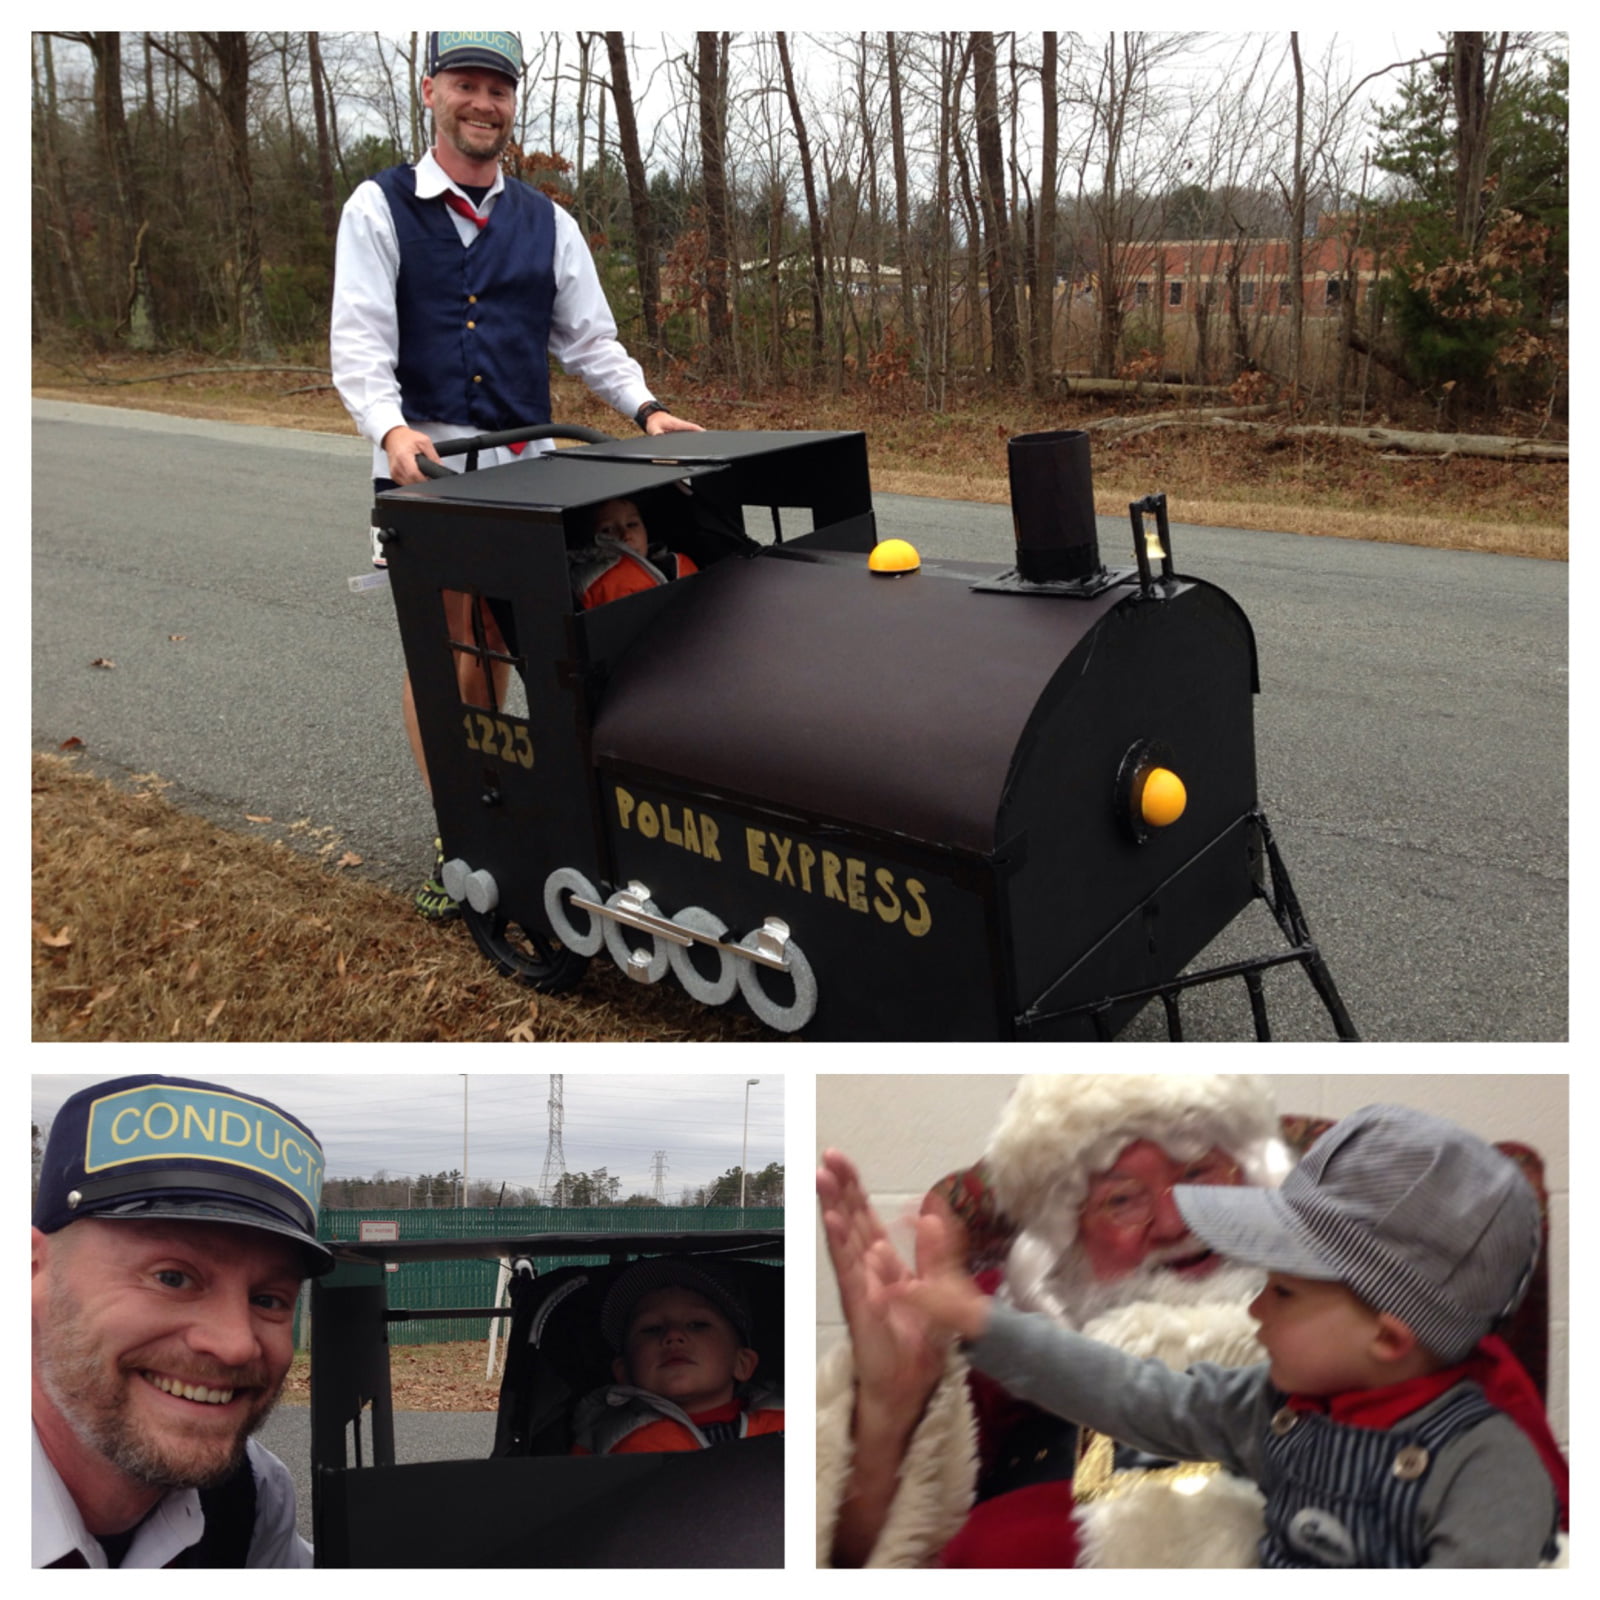
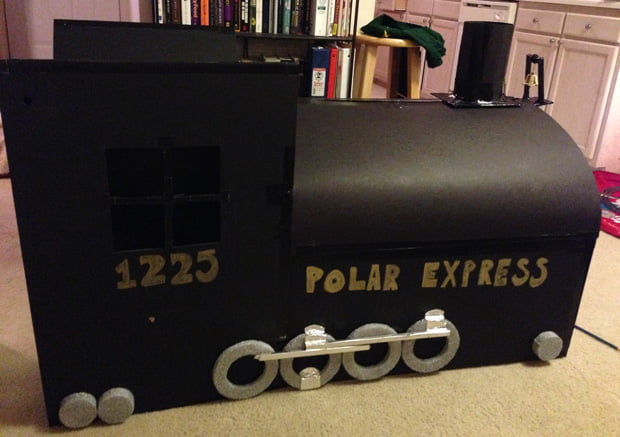
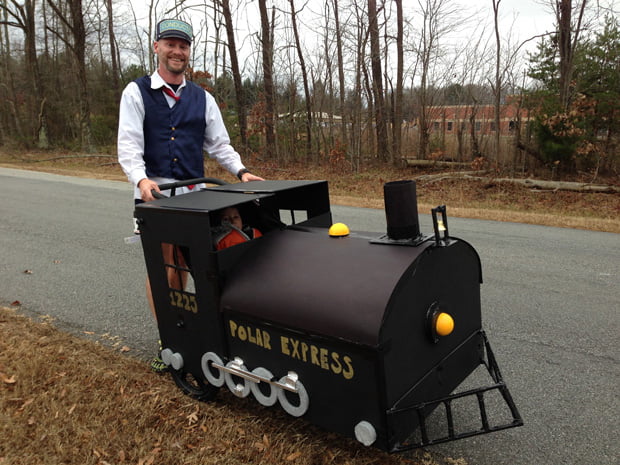
17. Lastly, I added the finishing touches with a gold paint marker. I wrote “1225” under each window and “Polar Express” along each side.
My son was so pumped, he demanded we go around the neighborhood to road test the train. It worked wonderfully. The true test was going to be race day.
A few days before the race the forecast was calling for 100% chance of precipitation on race day. Well, poop. I hit up Hobby Lobby once again for a can of waterproof finish and sprayed down the train.
On Friday, I sewed my vest (which took longer to do than build the train), and picked up a tie and shirt from the local Goodwill store.
Race Day
I built the train so it could pack down flat. But, I forgot to build it to fit in a car with a child in the back seat. Thankfully, my friend came by the night before and picked up the Polar Express (thanks Wes!). All that was left was to get a good night’s rest and show up early.
That night, I set the alarm for 6AM and my son and I went to bed around 9PM. Unfortunately, he had a few bad dreams and the two of us were up in the middle of the night on two separate occasions. As a result, I slept through my alarms, and woke up at 8AM for the 9AM race.
I don’t know if you have a child, but getting one up, dressed, and fed in less than an hour is a challenge. We didn’t have an hour. We had 20 minutes to get out the door so we could get to the race, pick up my bib, assemble the train, and get to the start line. Once again, the gods were favoring me. The two of us were out the door in 17 minutes and at the race location by 8:30AM.
Wes arrived just as I did. Huzzah! Three other friends came to my aid and helped me ziptie everything down, get dressed, and get my bib (thanks Lynn, Jim, and Mark!). With 4 minutes to spare my son and I rolled up at the back of a long line of runners waiting for the race to start. FYI, I usually run this race barefoot, but because of the forecasted rain I opted to go with Vibrams.
The gun went off and after about a minute of waiting in the back of the herd we were off! My son blew his whistle. Not the wooden one in his seat. No, he chose to yell “Woo! Woo!” as loud as he could.
The first mile required weaving, waiting, and running an extra tenth of a mile. The second mile was challenging as it was mostly uphill and the weight of the jogger, the train, and my 35 pound son were pushing back on me. Thanks a lot gravity! Mile three was rolling. And the last tenth of a mile was a straight shot to the finish line. My son “blew the whistle” and we crossed in 22:37.
At the awards ceremony my son and I won for best costume, and I nearly placed in my age group.
A huge thanks to all who lent a hand with the Polar Express. I can’t wait until next year!