Each year my running buddies attempt to convince me that the Christmas-themed race they’re going to run is the bees knees. They do their best to pitch their race to me. Quite frankly, they’re wrong. There is only one Christmas-themed race that has my continued support as numero uno—the Reindeer Romp 5K in Jamestown, NC. The community of runners is a top notch group of elites, weekend warriors, first timers, and kids who train as part of the GO FAR fitness club for kids. The atmosphere is fantastic. Santa, the big man himself, is there. And…AND…the race encourages runners to run in a holiday-themed costume.
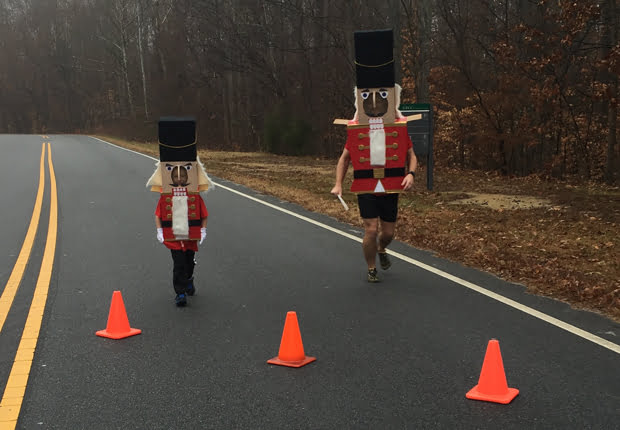
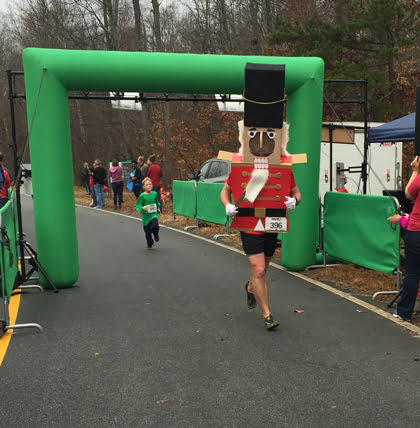
This year marked my sixth year running the Romp. I’ve run as a Christmas present, the Grinch and his sleigh, a Christmas tree, as a conductor pushing the Polar Express, and last year I managed to complete the race dressed as a 6 and 1/2 foot fireplace. My pattern of costumes is one that includes my son every other year. This year, he and I talked about several costumes. All of them involved me pushing him. He’s 5 years old now. He’s nearly 50 pounds. Pushing him in a stroller would be difficult enough without a costume. So we talked about what we could create and he, whilst channeling his inner Tchaikovsky, suggested something quite appropriate—a nutcracker.
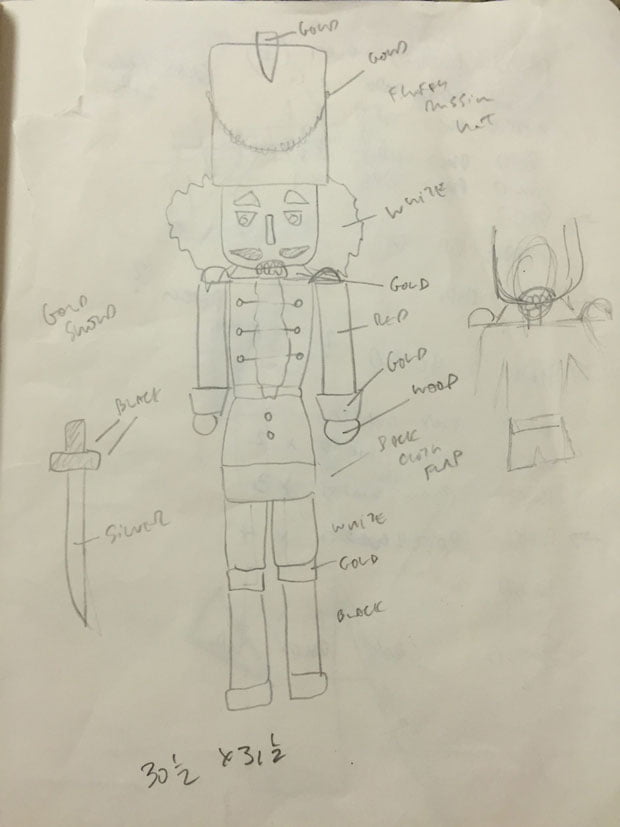
The Design
Our initial concept included a fully functional nutcracker with arms made made to look like big wooden dowels. The mouth was a conundrum. After a great deal of thought I figured out how to make it function, but the issue with my design (and all of the designs) was that they all impeded my ability to take in fresh air. You see, I would need at least an extra 3″ of space for the costume’s mouth top open which would put my real mouth 3″ from fresh air. Given my experience with breathing last year, I opted not to go with this design.
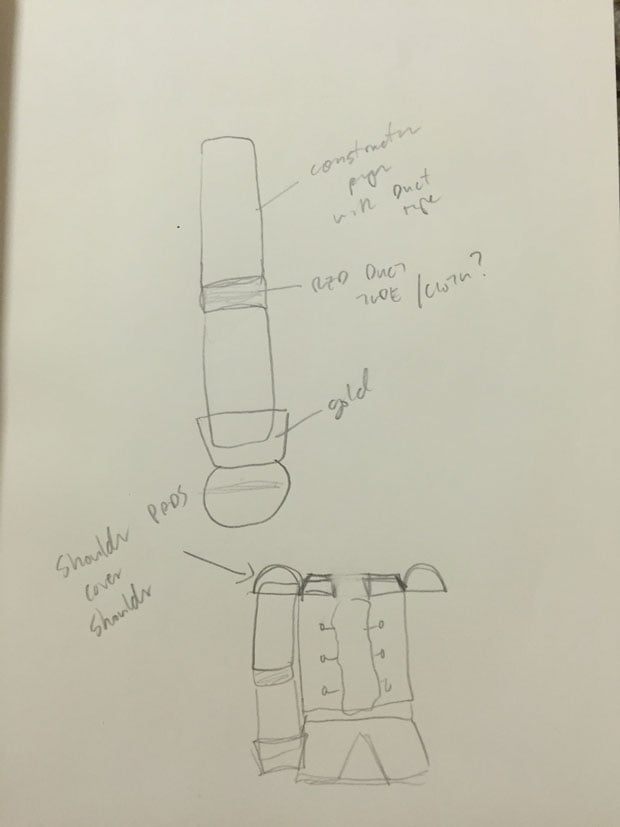
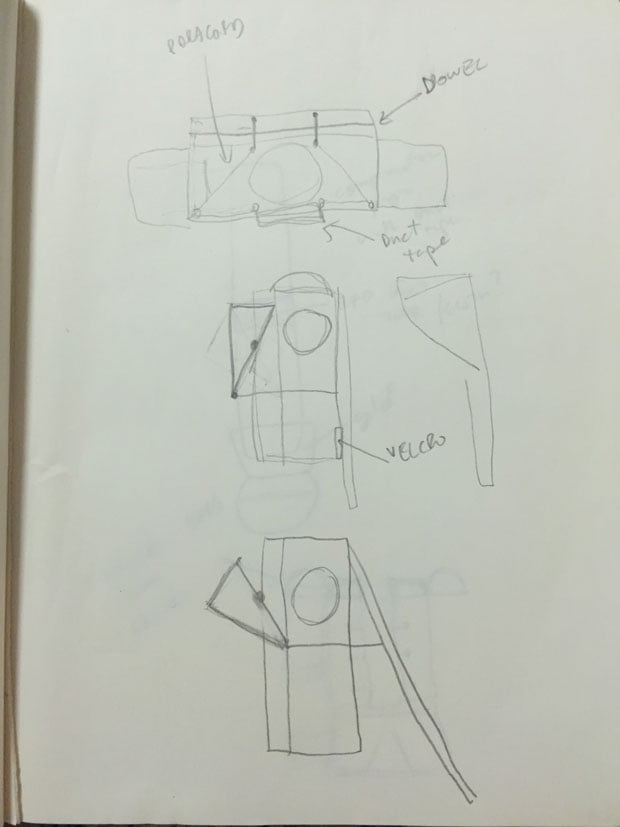
Then there were the arms. I wanted them to look like the arms on a real wooden nutcracker. First, I tried mailing tubes, but quickly realized that I the tubes didn’t come in the size I needed (btw, the folks at Office Depot will stare at you if you try on mailing tubes in the store). The small tubes didn’t slide over my arms, the medium ones didn’t slide up to my shoulders, and the large ones were too big. I also considered creating arms by rolling up poster board but the 55°F forecast coupled with my tendency to sweat buckets made me realize that poster board would deteriorate well before I crossed the finish line.
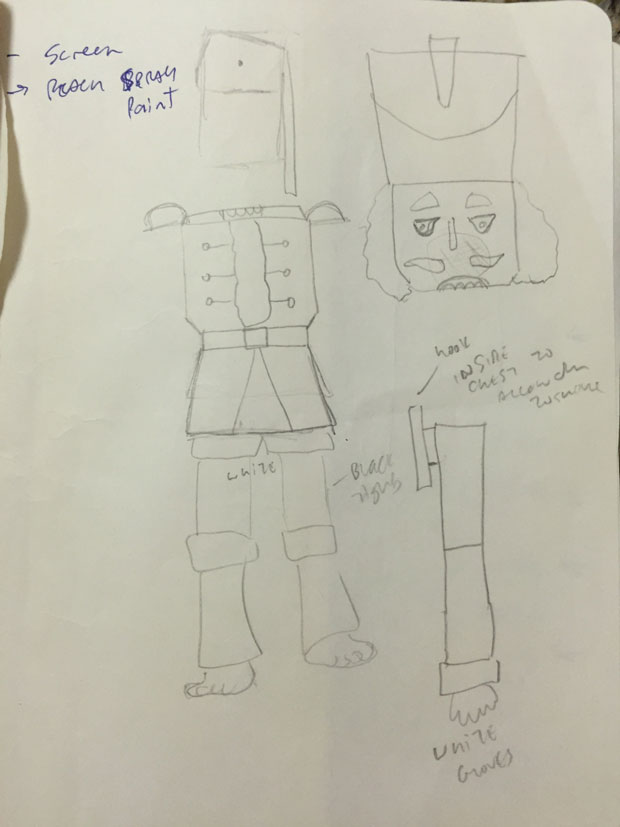
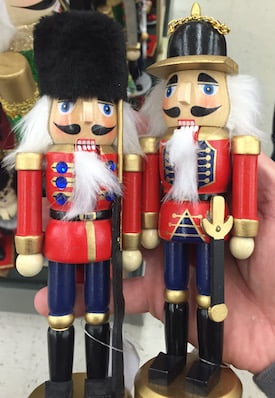
In the end, my son and I decided to bail on making one fully functional super nutcracker in favor of two, still awesome, traditional nutcrackers.
Last year I made a prototype which helped a ton. This year, I didn’t feel the need to create one because nutcrackers are aplenty at any craft store between October and December.
The Supplies
With my mom, niece, and son in tow we hit up Hobby Lobby with a mental list of what was needed. It would take two additional trips to Hobby Lobby, one to Michael’s, and one to Office Depot before I ended up with this stuff:
- White foam board (30″ x 20″) x 3
- Black foam board (30″ x 20″) x 5
- Red foam board (30″ x 20″) x 5
- Red Duct tape x 3
- Black Duct tape x 2
- White Duct tape x 2
- Peach(ish) Duct tape x 2
- Roll of clear packing tape
- Can of Elmer’s spray adhesive (11 oz)*
- Index cards (5″ x 7″)*
- Basswood (24″ x 1″) x 2
- Basswood strips (24″) x 3*
- Braided gold trim (1/4″)
- Black felt (2 yards)
- Spool of black thread*
- Sewing needle*
- White fur trim (9″ x 12″) x 6
- Roll of jute mesh (12″)
- Markers and crayons (red, black, blue, and peach)*
- White zip ties*
- Metal yard stick*
- Razor blade*
- Scissors
*Denotes supplies I had on hand.
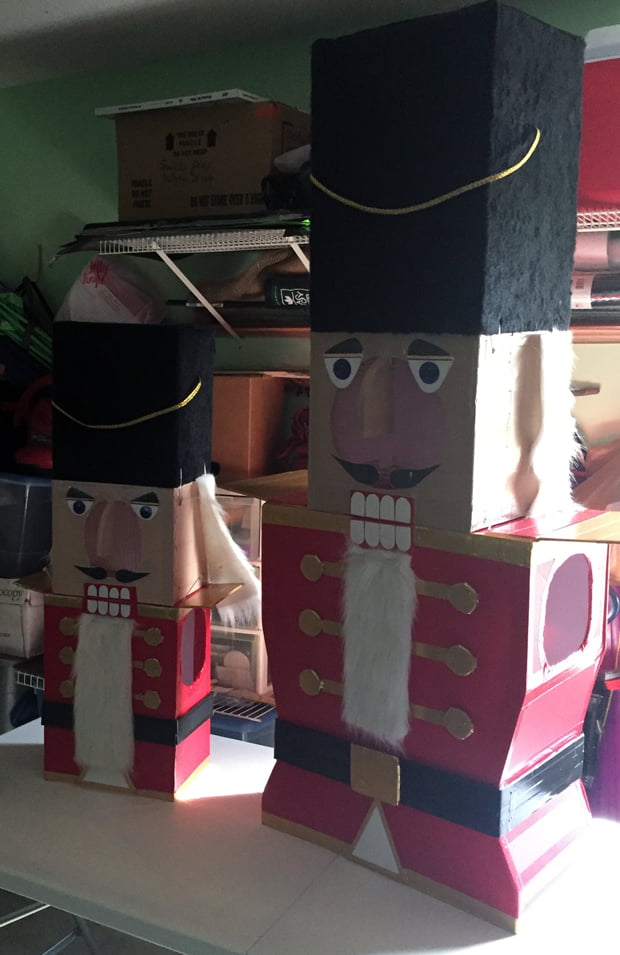
The Build
I don’t have too many progress photos this year as my son was helping and he had little patience for me stopping the creative process (mainly because he couldn’t wait for me to build his costume). Instead I have one that I took after day 1 that I cut up to show the different parts.
I always start with the body. For it I used red foam board to create the front, and then cut out the waistline pieces. I then laid the front on top of the back piece and carved out the waistline for the back. For the sides I had to measure each length of the three waistline cuts to ensure the sides would match up on the front and back. I then fastened all the pieces together on the inside and out with red tape. I eyeballed the arm holes, cut out an ovalish shape, and taped over the holes with red tape (so my arms aren’t cut up when they rub against the board as I run). For the neck hole I used a plate to trace a hole, cut it out, and used red tape to cover the edge.
To top off the body, I created the shoulder pads with white foam board, taped half of each with gold duct tape and fastened the other half to the body with red tape. To ensure I could put the costume on I gently creased the shoulder pads so they’d bend when I slid my arms through the holes.
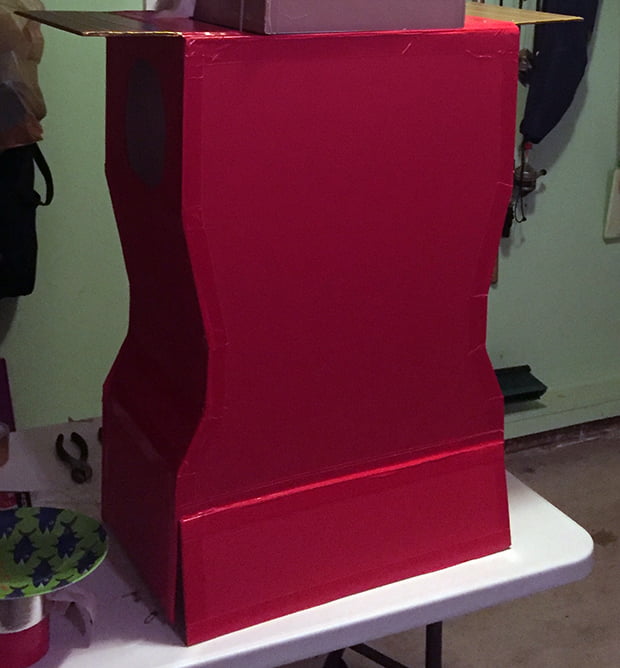
Take notice of the flap at the bottom. When I first tried on the costume I realized my thighs weren’t going to be able to move so I cut in a flap. The more I tried the costume on, the more I realized how much I didn’t want to hear the sound of the flap banging against my leg over the course of the race. So, I cut off about 6″ from the bottom of the body.
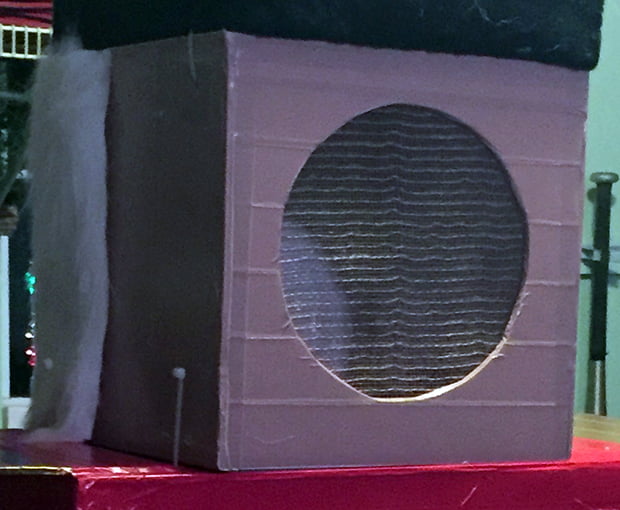
Leaving the finer details for later, I focused on the head next. From white foam board I cut out the back and side pieces and fastened them to together with peach tape on the outside and white tape on the inside. I then cut the face piece from white foam board, and used my trusty plate to trace a circle and cut out the hole. On the inside I taped a piece of jute mesh. The purpose of the mesh was twofold: 1) I wanted to match the color of the face that I’d tape with peach duct tape, and 2) I wanted to make sure I had enough holes to allow oxygen in as I ran (a problem I encountered in two previous races).
Knowing that I’d have to attach the head to the hat and to the body with zip ties I took four strips of basswood and taped them at the base and top of the head. I do this because when the zip ties are tightened I run the risk of tearing through the foam board if there’s nothing in place to prevent that from happening. Once the wood was secure, I wrapped the entire head with peach tape and headed to the beauty parlor.
Using zip ties I fastened the fur strips onto the side and back of the head. Seriously, I use a lot of zip ties and Duct tape in my costume constructions. So much that it’s become a requirement for all costumes that I build.
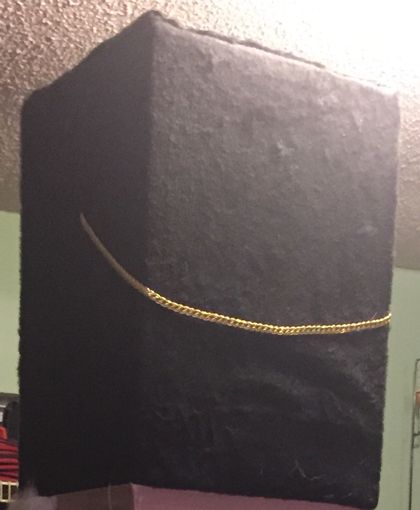
The hat was up next and was to be a third taller than the head. For the frame I used black foam board. Measure, cut, and tape. When I finished the hat my son took a piece of foam board from our trash bucket and pushed it inside the hat. He looked at me and said, “For support.” By golly he was right. I used three pieces to keep the hat secure, and thanked my son for being a brilliant engineer.
I then taped two pieces of basswood on either side of the base of the hat where it would join the head. For the outside of the hat I taped one edge of the felt to the outside of the hat and wrapped the rest with the remaining felt. Using safety pins I secured the felt in place until I could sew it together.
The detail on the hat was limited to the braided gold trim. I cut the appropriate length, wrapped the ends in gold tape, punched a hole in each side of the hat, and secured the taped ends to the inside of the hat with black tape. To finish off the hat I punched holes at the base where I would run zip ties through and set my hat aside.
With my first night of construction nearing an end my son began asking when his costume was to be built. So, using the same approach as I had for mine (with the exception of the waistline cuts) I built his costume in about an hour. With his costume built to the same extent as mine we hit the hay and picked up the detailing of our costumes the next day.
Day two involved a lot of we and much less of just me. We began our day with the costume details consisting of eyes, nose, mustache, teeth, shirt buttons, shirt triangle, beard, and belt. I used foam board for the top and bottom gums, and index cards for the teeth. I stuck the teeth on the gums with spray glue and fastened them to the body and head with the appropriate colored tape. The beards were fastened with zip ties and were the quickest part of the day. Belts were made of black foam board wrapped in black tape and secured to the costume body with tension after taping the ends of the belt together. For good measure we created belt buckles from white foam board and gold tape, and triangles trimmed with gold tape and fastened with tape and spray glue.
The buttons were hand drawn circles cut out of white foam board and wrapped in gold tape. We used a combination of spray glue and gold tape to secure them to the body and red tape to cover any extra gold tape. The final touch on the shirt was gold tape trim on the top and bottom of the costume body.
For the facial features I hand drew the eyes and mustache on index paper, cut them out, colored them with permanent marker, laminated them with clear packing tape, and fastened them to the head with more clear tape. Each nose was made of rounded triangles cut from white foam board, placed on top of a T-shaped piece of foam board, and wrapped with peach tape. To secure the nose to the head, I slid the T of the nose between the jute mesh and the face piece and taped it down on the inside.
The last bit of the costume included a rifle and a sword. My son made his own rifle and I built my sword.
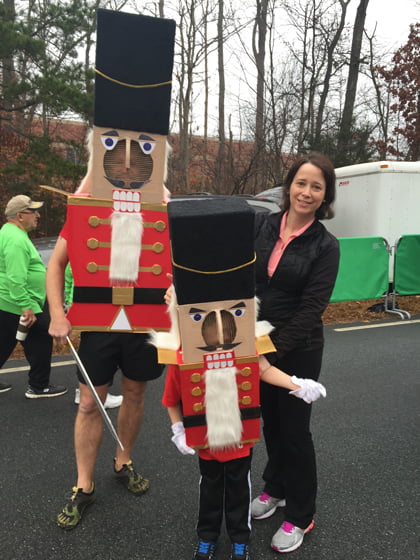
After ~19 hours of manual labor my son and I had finished our two costumes.
We tried on our costumes multiple times throughout the process, ran circles in the garage, and made one final adjustment. We added socks to pad our shoulders and taped them down to the inside top of the body. With socks in place, we agreed that he’d be able to run his 1-mile race and I’d be able to go the distance in the 5K.
The Race: Part 1
On race day we made it to the race with plenty of time. My son was super pumped about running in the 1 miler. He had been training on the sidewalks and practicing in his costume by running laps at the house. After meeting up with my sister and niece, my son, my wife, and I made our way to the start line.
The start horn sounded and we were off. And by off I mean we were walking. For about a hundred feet we walked before my son said to me, “Why are we walking?” To which I replied, “We can run whenever you want.” “Nah” he said, “I just want to enjoy this.” So we did. We stopped on occasion to take photos with folks who asked (including a friend who was celebrating her birthday).
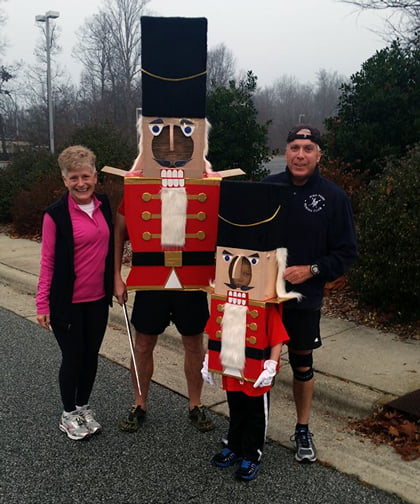
We spent most of the race looking at things from birds to the ground to a passing train. When it came time to finish my son decided to sprint to the finish. He was done and now it was my turn to run the 5K.
The Race: Part 2
The 5K race started out fine. I ducked to get under the start/finish line then off I went. Picking up speed it was clear the heat (60°F) was going to be an issue. Thoughts of tearing out the face mesh crossed my mind, but I opted not to destroy the costume in favor of slowing to 8-ish pace. Mile 1 came and went at 7:58 pace. Mile 2 was mostly uphill, but I managed an 7:55 pace. Mile 3 was rough. At this point I was sweating a storm and my breathing had become labored. I didn’t pick up the pace too much and eventually crossed in 23:55.
The Recap
Building the costume was really fun especially since my son was totally into the builds. The race was a lot of fun. Having my son participate was a great addition. The weather was a bit hot, but hey, I’m not going to complain too much about having great weather. A big thanks to my wife for putting up with my son and I for another year of race preparations, and to my family and friends for their support.
The Results
BTW, if you’re wondering where this year’s race time stacks up against the previous five here you go:
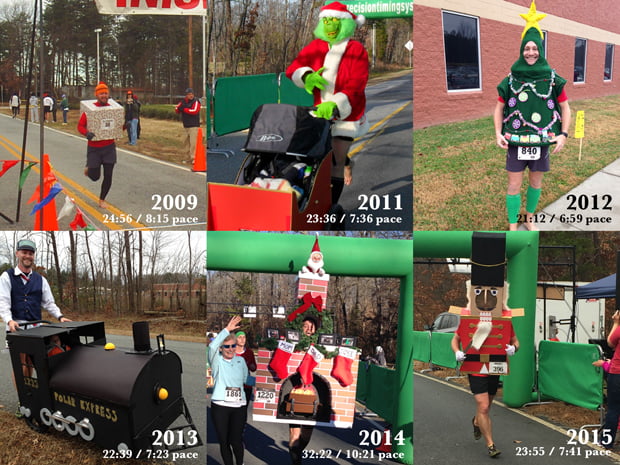
- Christmas Tree (solo) 21:12 / 6:59 pace
- Conductor and Polar Express (baby jogger) 22:39 / 7:23 pace
- Grinch and Sleigh (baby jogger) 23:36 / 7:36 pace
- Nutcracker (solo) 23:55 / 7:41 pace
- Christmas Present (solo) 24:56 / 8:15 pace
- Fireplace (solo) 32:22 / 10:21 pace